
Quick answer
To add audio to Google Slides, upload an .mp3 or .wav file to Google Drive first, then open the slide and go to Insert > Audio. Pick the file and click Insert. Use Format options > Audio playback to start it on click or automatically, loop it, or hide the icon while presenting.
- Why the audio has to be in Drive first
- Step 1: Upload the audio file to Google Drive
- Step 2: Open the slide where the audio belongs
- Step 3: Insert the audio
- Step 4: Set how the audio plays
- What changes after you press play
- Formats, limits and things that break
- More Guides
- Frequently asked questions
You have a recorded narration or a music track, and you want it to play inside your presentation. The path looks obvious, but Google Slides will not take audio dragged from your computer. It only reads files that already sit in your Google Drive, and only in .mp3 or .wav.
That explains most of the confusion in the support forums. The Insert > Audio option does nothing for anyone who never uploaded audio to Drive, and the .m4a file from a phone never shows up in the picker.
This guide walks the whole process with real screenshots: where the file has to live, how to insert it, and above all the playback panel that most tutorials never show.
Why the audio has to be in Drive first
Google Slides does not store the audio inside the presentation file. It stores a link to the file living in Drive. Three practical consequences:
- The file has to be in the same account you use in Slides. Audio shared with you from another account does not appear in the picker.
- If you delete the audio from Drive, the sound stops playing in the presentation. Slides keeps no backup copy.
- Only .mp3 and .wav. An .m4a recorded on a phone or an .aac downloaded from a stock library has to be converted first.
Also note: Google’s mobile apps for Android and iPhone/iPad can add audio too. The screenshots here follow the browser, because that is where the playback panel shown below lives.
Step 1: Upload the audio file to Google Drive
Upload the file
Open Google Drive and upload the .mp3 or .wav. It can go in the Drive root or inside a project folder; either way works, because the Slides picker searches the whole Drive.
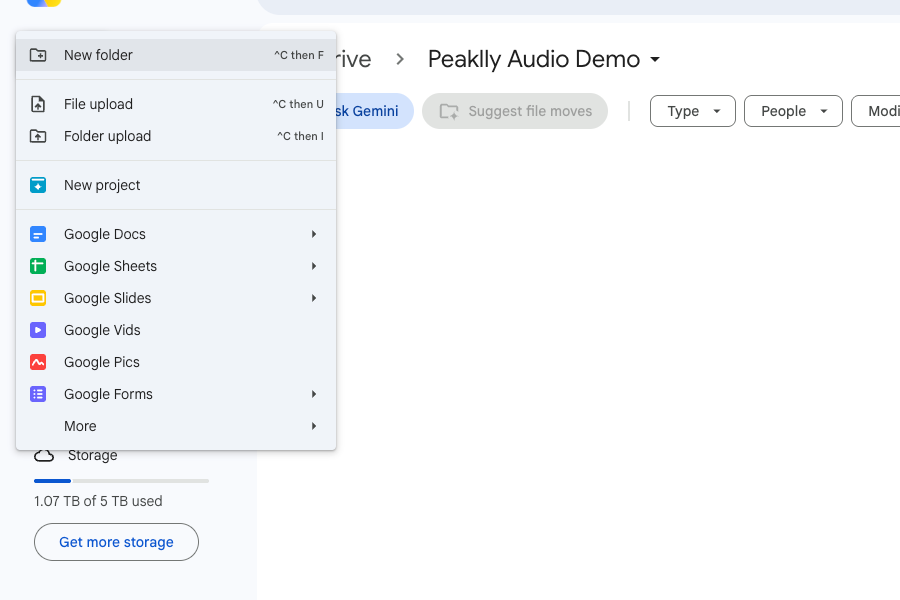
If the format is wrong, the file uploads fine but never shows up when you try to insert it. Convert to .mp3 first: ffmpeg does it in one command, and any online converter works too.
Step 2: Open the slide where the audio belongs
Pick the slide
Open the presentation in Google Slides and click the slide where the sound should start. That is the slide where the audio icon will sit.
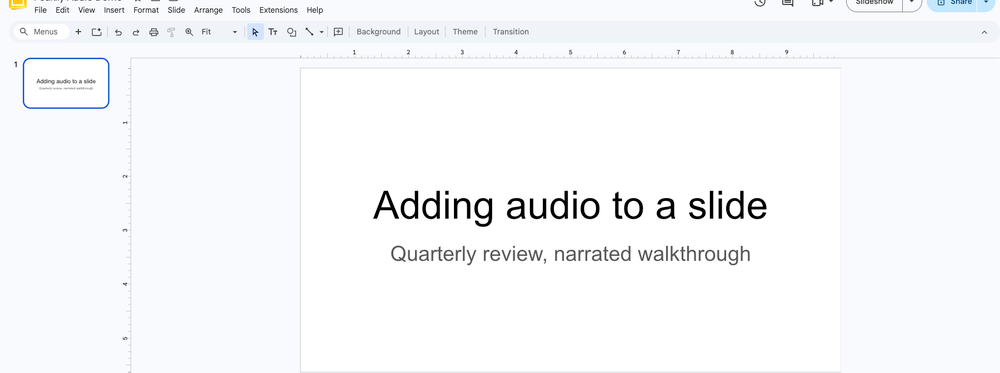
If the audio should play across the whole presentation, put it on the first slide. Keep in mind that Stop on slide change is checked by default, so the sound dies on the first advance unless you turn that off, which is covered in step 4.
If you want narration per slide, use one file per slide, which gives you more control over pacing.
Step 3: Insert the audio
Open the Insert menu
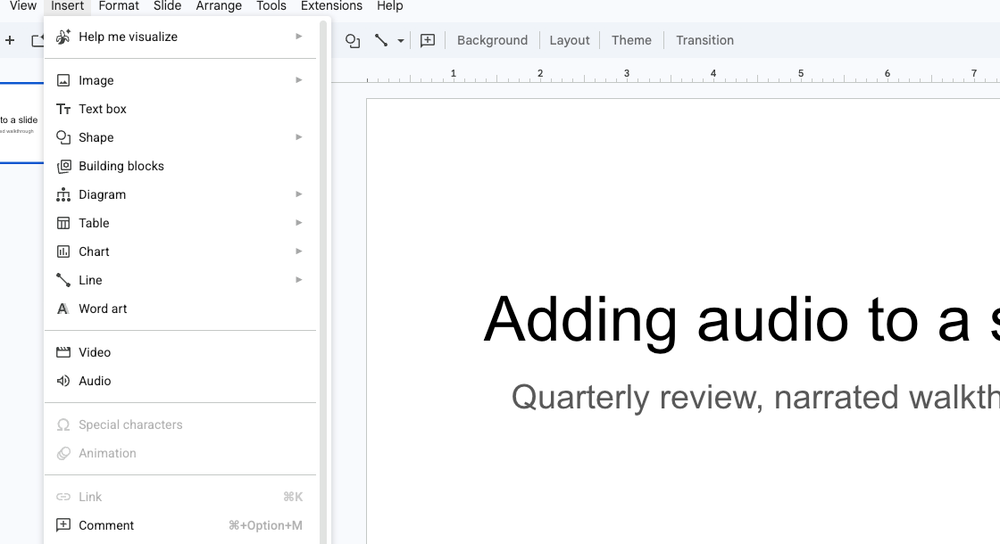
With the slide selected, click Insert in the top bar. The Audio item sits right below “Video”.
Choose the file and click Insert
Google’s picker opens showing the folders in your Drive. Browse to the folder or use the search box at the top to find the file by name. Click it, then confirm with Insert.
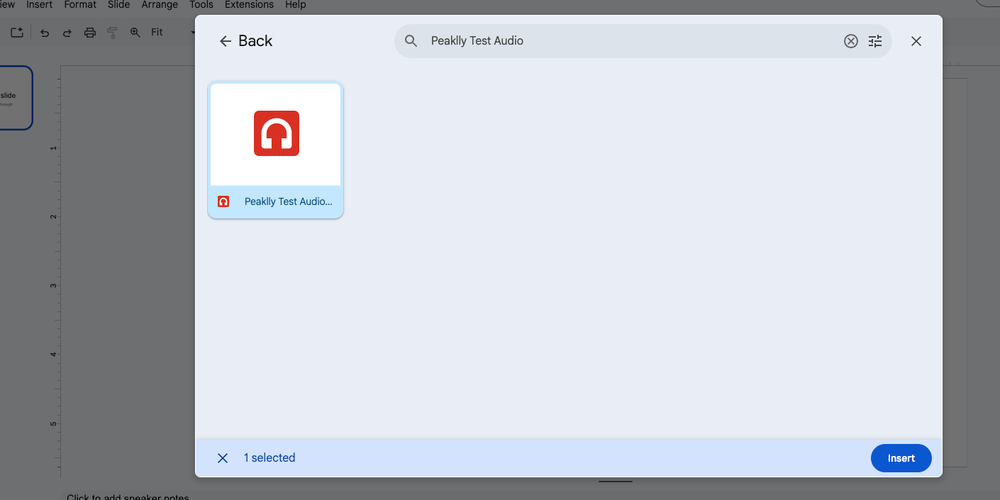
If the list comes up empty, it is almost always one of three things: the file is not .mp3 or .wav, it belongs to another Google account, or the upload has not finished yet.
Step 4: Set how the audio plays
The playback panel opens with the audio
As soon as the audio lands, Slides opens the Format options panel on the right, already on the Audio playback section. This is where the behavior is set.
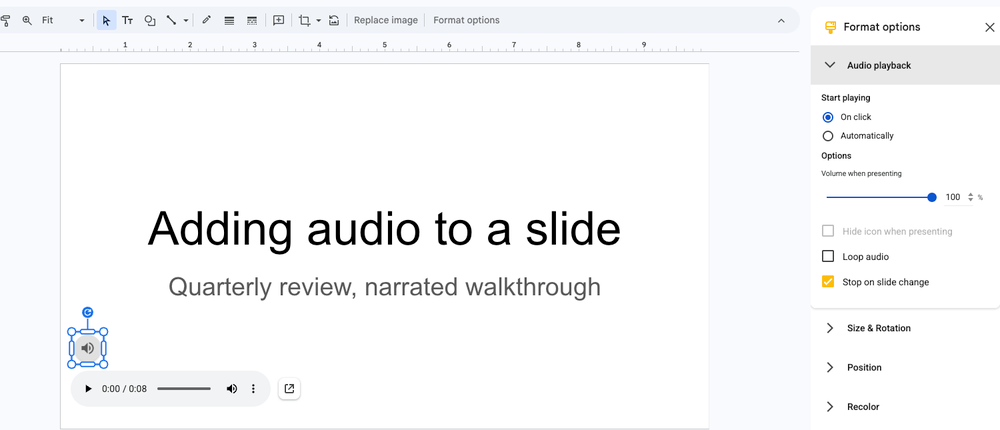
Choose between On click and Automatically
Under Start playing there are two options:
- On click: the sound starts only when you click the icon during the presentation. It is the default and the safest choice for narration, because you control the timing.
- Automatically: it plays on its own when the slide appears. Better for background music.
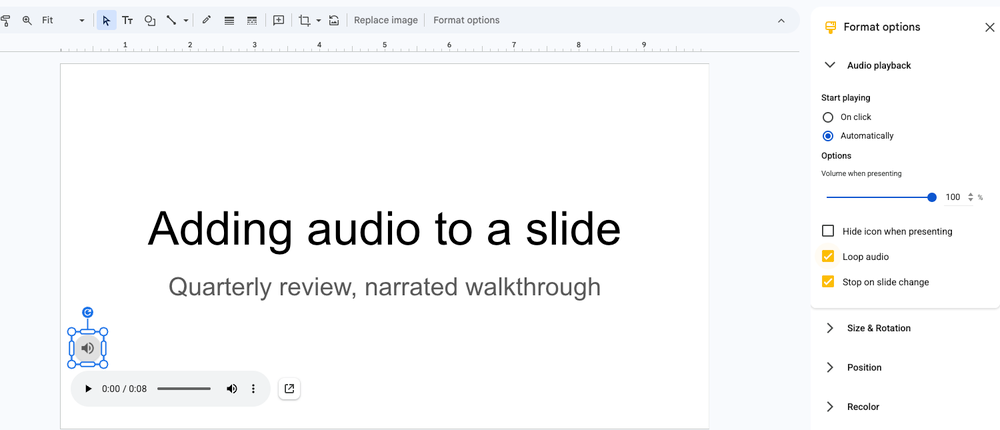
The boxes that solve the usual problems
- Volume when presenting: how loud the audio is relative to everything else. If the narration came out quiet, this is where you compensate.
- Hide icon when presenting: hides the speaker icon during the show. This option only becomes available once Start playing is set to Automatically, which is why it looks grayed out on a fresh insert.
- Loop audio: repeats the file until the slide ends. That is how a short track covers a long slide.
- Stop on slide change: stops the audio when you advance. It comes checked, so uncheck it if you want the music to carry over between slides.
For background music across a whole deck, the combination is Automatically + Loop audio checked + Stop on slide change unchecked.
What changes after you press play
Test it before presenting
Click play on the player on the slide and listen. The time appears next to the play button, and you can drag the bar to check the end of the track. Then click outside the player to close the panel.
How it behaves in presentation mode
In presentation mode the audio plays according to the option picked under Start playing. If the icon is visible, it appears on the left side of the slide; with Hide icon when presenting checked, it disappears and the audio keeps playing.
One limitation worth knowing: when you download the deck as PowerPoint (.pptx), the audio usually does not come along. To guarantee sound, present straight from the browser or export the deck as a video.
Formats, limits and things that break
| Situation | What happens |
|---|---|
| .mp3 or .wav in Drive | works |
| .m4a, .aac, .ogg | never appears in the picker |
| Audio from another Google account | never appears in the picker |
| File deleted from Drive | the sound stops playing |
| Deck exported to .pptx | audio is usually lost |
| Mobile app | can also add audio |
About size: the practical limit is Drive’s own, and narration files rarely come close to it. Duration is what matters. A ten-minute track in .wav gets big, and converting to .mp3 shrinks it with no noticeable loss for a presentation.
More Guides
If you are building presentation material, it helps to know how to make a slideshow in Canva, how to convert Canva to Google Slides without breaking the layout, and how to convert DOCX to Google Docs when the content comes from Word.
Frequently Asked Questions
Almost always one of three reasons: the file is not .mp3 or .wav, it lives in another Google account, or the upload has not finished. Convert the format, move the file to the account you use in Slides, and try again.
Yes. Google’s mobile apps for Android and iPhone/iPad can add audio. The picker and playback controls are laid out differently from the browser, which is the version shown in this guide.
Only if you switch it under Format options > Audio playback > Start playing to Automatically. The default is On click.
Uncheck Stop on slide change and check Loop audio. The file then keeps playing as you move forward.
In .pptx, usually not. If you need guaranteed sound, export as a video or present straight from the browser.
Only .mp3 and .wav. Size follows the Google Drive limit, and for narration that is rarely an issue. Prefer .mp3 for long files.