
Quick answer
To make a slideshow in Canva, click “Create a design” and pick “Presentation.” Add your photos or use a template, customize the slides, and hit the “Present” button in the top right corner. You can present live or download it as a video.
- Why use Canva for slideshows?
- Step by step: How to make a slideshow in Canva
- Enhancing your Canva slideshow
- The mobile shortcut (For the Canva App)
- More Canva Guides
- Frequently asked questions
Making a presentation or a photo slideshow used to mean wrestling with PowerPoint formatting. Today, Canva is the fastest way to put together a visual slideshow that actually looks good.
Whether you’re building a pitch deck for a meeting, a photo slideshow for a wedding, or a portfolio presentation, Canva gives you the canvas and the tools to do it straight from your browser. No software installation required.
In this guide, we’ll walk you through the entire process of creating, animating, and presenting a slideshow in Canva. Every step is documented with real screenshots taken directly from the Canva editor.
Why use Canva for slideshows?
Before we jump into the steps, it helps to understand why Canva is often a better choice than traditional presentation software:
- It lives in the browser. You don’t have to worry about compatibility issues or missing fonts when presenting on a different computer.
- The templates are modern. Instead of the standard bullet-point layouts, you get access to thousands of designer-made presentation templates.
- Easy media integration. Adding photos, videos, and graphics is a simple drag-and-drop process, with millions of stock assets built directly into the sidebar.
- Instant sharing. You can share a view-only link, present live, or download the file as an MP4 video or PDF.
Step by step: How to make a slideshow in Canva
Follow these exact steps to build your slideshow from scratch.
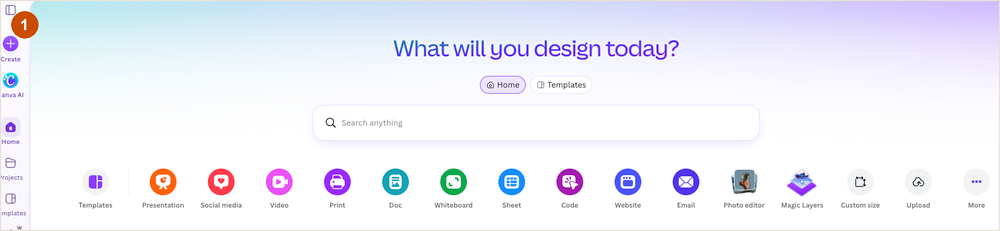
Step 1 – Open the Canva homepage
Log into your Canva account and open the homepage. You’ll land on a screen that asks “What will you design today?” with a row of quick shortcuts for different project types.
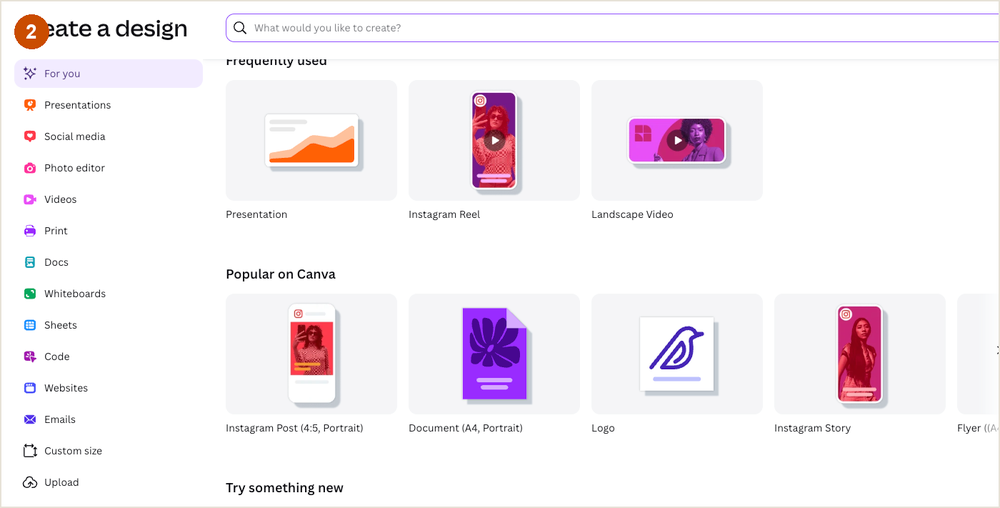
Step 2 – Click “Create a design” and pick Presentation
Look at the top left corner and click the purple “Create a design” button. A menu will open with all the design categories. Click “Presentations” and then the “Presentation” card, which uses the standard 16:9 widescreen format.
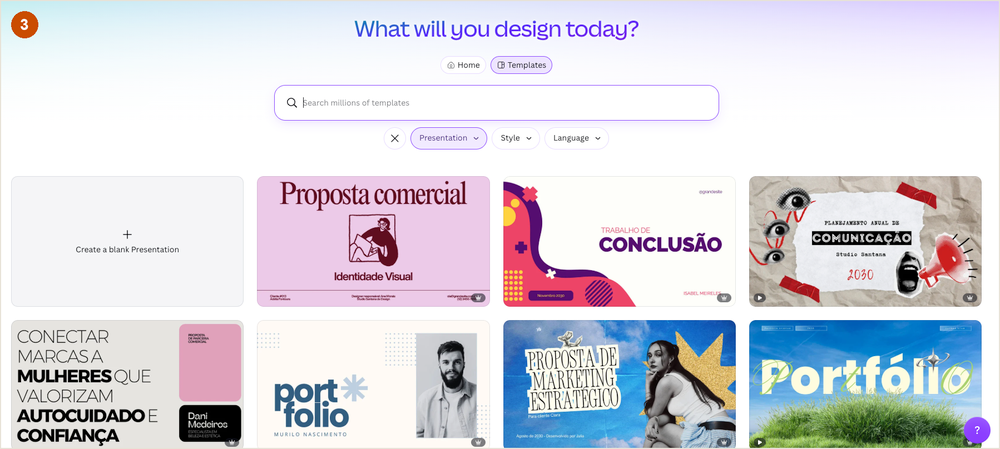
Step 3 – Choose a template or start blank
The next screen shows the presentation template gallery. You can search for a theme, browse the thumbnails, or click “Create a blank Presentation” to build everything yourself. If you want a head start, just click a template to load it into the editor.
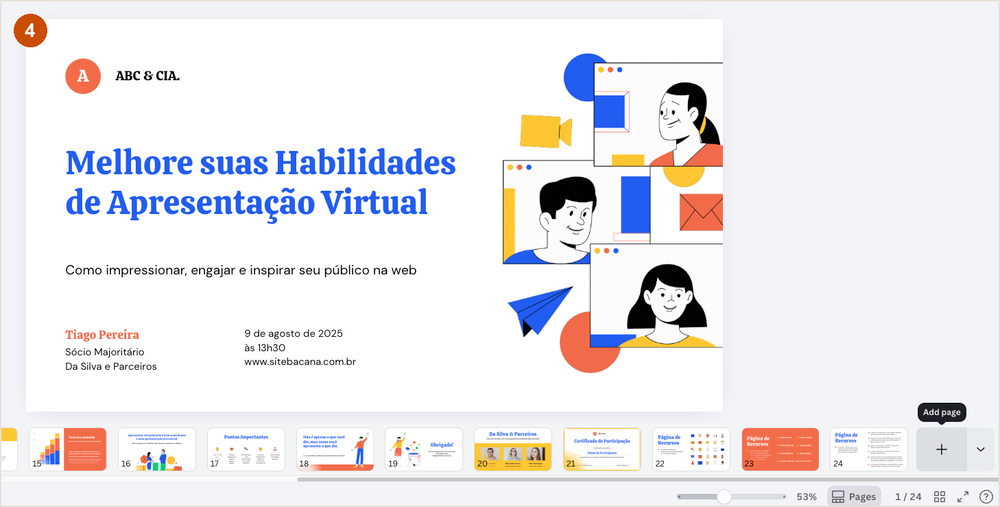
Step 4 – Add your slides
Once the editor opens, your first slide is ready. To add more pages to the slideshow, look at the bottom timeline and click the “+ Add page” button. Each new page becomes another slide in the presentation.
Step 5 – Add text and photos
Populate your slides using the left sidebar. The “Text” tab adds headings and body text, and the “Uploads” tab brings in your own photos and videos. Drag anything onto the canvas to place it. Keep your text short: people should be looking at your slides, not reading a wall of words.
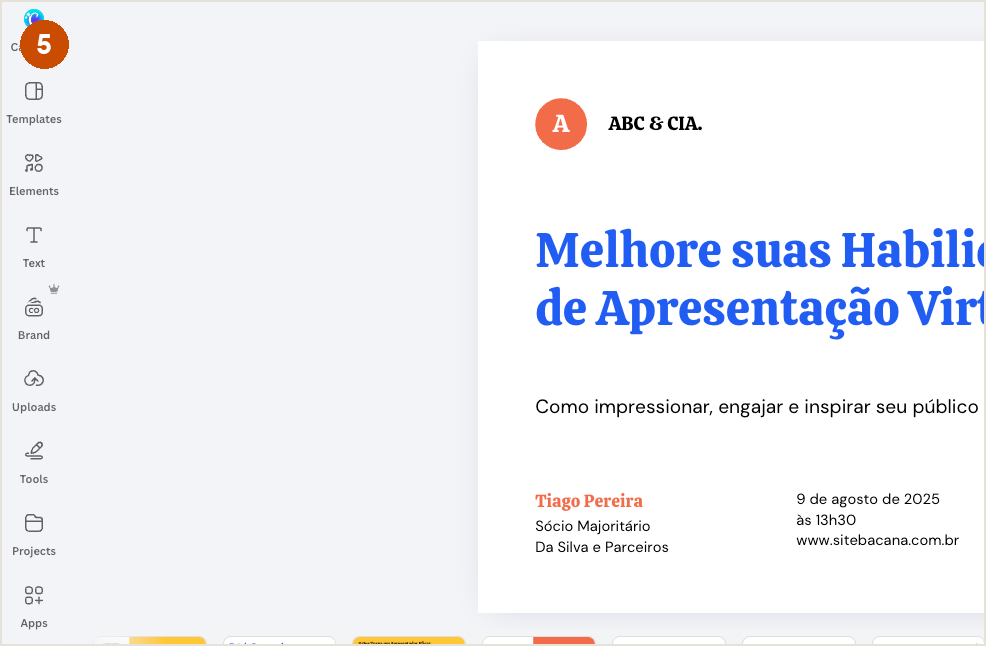
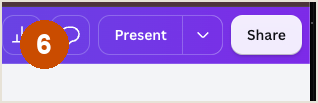
Step 6 – Click the Present button
When your slides are ready, look at the top right corner of the editor and click the “Present” button. It sits right next to the “Share” button.
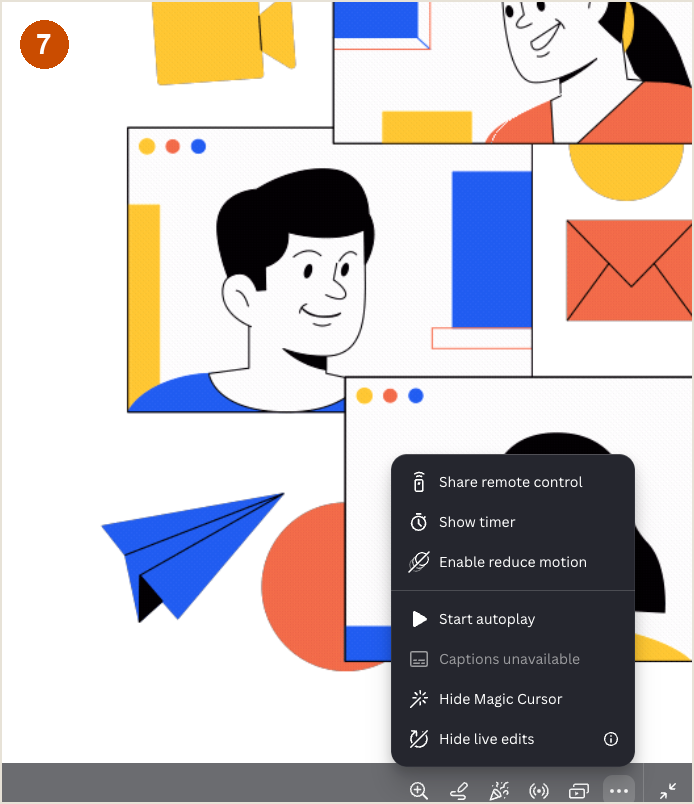
Step 7 – Choose the presentation mode
A menu will pop up with the playback options. You can pick “Start autoplay” to let the slides advance on their own, or present live and control the slides yourself. The same menu has a timer and remote control sharing for when you’re on stage.
Enhancing your Canva slideshow
Once you have the basics down, you can use Canva’s advanced features to make your presentation stand out even more.
Adding transitions and animations
A static slideshow is fine, but movement keeps the audience engaged. Select any element, click the “Animate” button on the top toolbar, and pick an effect like “Fade,” “Pan,” or “Rise.” To add a transition between two slides, hover your mouse between the page thumbnails in the bottom timeline and click the “Add transition” icon.
Adding music and audio tracks
If you’re creating a photo slideshow or a video presentation, background music is essential. Click the “Elements” tab on the left sidebar and scroll down to “Audio,” or search for a specific mood like “upbeat background music.” Drag the audio track onto your timeline at the bottom. Click the purple audio track to adjust volume, trim the length, or add fade-in and fade-out effects.
The mobile shortcut (For the Canva App)
If you’re traveling or need to build a slideshow quickly on your phone, the Canva mobile app works just as well.
- Open the Canva app and tap the big purple “+” button at the bottom of the screen.
- Select “Presentation” from the format list.
- The editor works exactly like the desktop version. Tap the “+” icon to add templates, text, or photos from your camera roll.
- Swipe left on the canvas to add a new blank slide.
- Tap the play icon at the top of the screen and select “Present.” The app will switch to full screen automatically.
More Canva Guides
If you’re building a presentation, you might also need to know how to do a hanging indent on Canva for your reference slide, or how to highlight text in Canva to make key points stand out. If your team uses Google Workspace, you can also convert Canva to Google Slides before presenting.
Frequently asked questions
Yes. Click the “Share” button in the top right corner, then click “Download.” Change the file type dropdown to “MP4 Video.” Make sure all pages are selected, and click download. The file will save to your computer with all your animations and audio included.
Yes, creating, animating, and presenting a slideshow is completely free. You only need a paid Canva Pro account if you decide to use premium templates, stock photos, graphics, or fonts marked with a small crown icon. If you stick to the free elements, you won’t pay a dime.
Yes. Click “Share,” select the option that says “Anyone with the link,” and set the permission to “Can view.” Click “Copy link.” You can send this link via email or Slack, and anyone can view the slideshow directly in their web browser without needing a Canva account.
Click anywhere on the background of a slide, making sure no text or image is selected. On the top toolbar you’ll see a clock icon with a number, like “5.0s.” Click it to change how many seconds that slide stays on screen during autoplay.
Yes. On the Canva homepage, click the “Upload” button in the top right corner and select your .pptx file. Canva converts your PowerPoint slides into a Canva design. Most text and images transfer fine, but complex animations and custom fonts from PowerPoint won’t carry over.